Import Customers
Customers can be imported from an Excel spreadsheet to eliminate manual customer entry and speed up the process.
1. Create a spreadsheet with your customer’s information. (NOTE: If you choose not to use bid card numbers, customers will only be imported into the Customer Center.)

2. After completing your spreadsheet, save it and close Excel.
3. Open Auction Flex and choose your desired auction from the Active Auction drop-down menu.

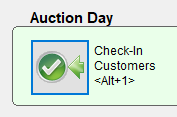
4. Under the Auction Day section, click Check-In Customers button, or click the Check In button on the Navigator toolbar.
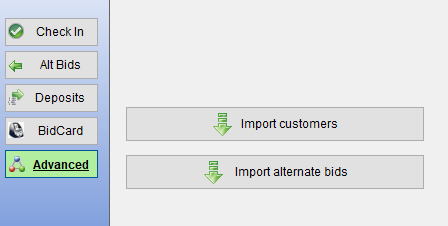
5. From the side menu, click the Advanced button and then click the Import Customers button.
6. On Step 1, click the Browse (ellipses) button and select the Excel spreadsheet you created. You will also need to enter the name of your Excel worksheet (a standard default name is Sheet1) in the Excel Worksheet Name field.
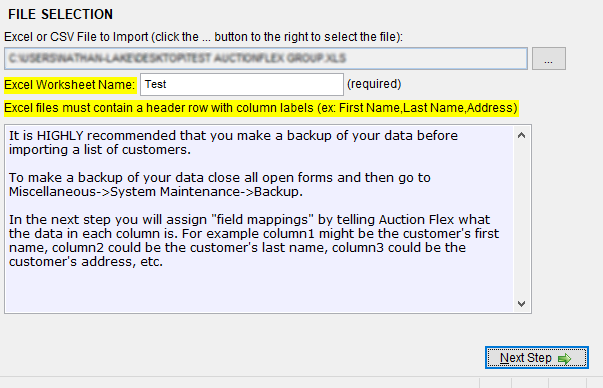
7. Click the Next Step button.
8. On the Field Mapping & Options panel under Available Fields, select the fields that are present on your spreadsheet and click the Add button to move each one to Fields Included With File To Import.
The fields should be in the same order as they appear on the spreadsheet, so if “First Name” is in row A, for example, then “First Name” should be the first field listed on this panel under Fields Included With File To Import.
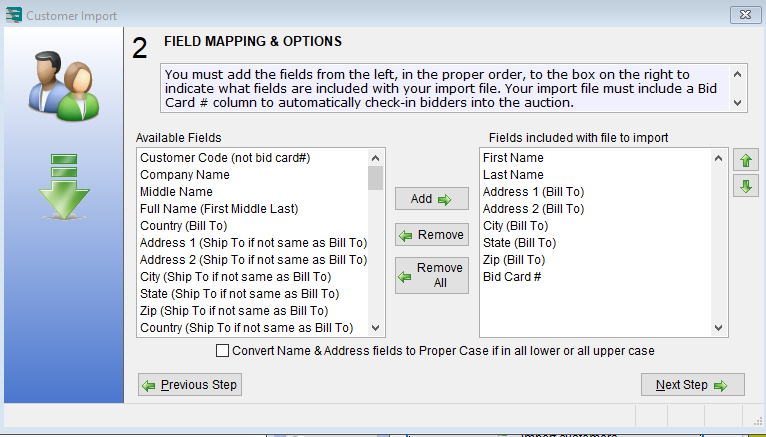
Guide to field mappings:
To expediate the field mapping process, Auction Flex features several preset configurations common to auctions. The following options can help to speed up the import and mapping steps.
Mailing Codes (Format = XX XX) – This import field is designed for customers importing a list of buyers from other software programs where the mailing list codes are stored in groupings of 2 letters, such as AN VE—where the AN might stand for Antiques and the VE might stand for vehicles. You can have up to 15 two-letter mail codes in this field.
Mailing List 1-10 (Y/N) – These import fields are designed for customers importing a list of buyers where there is a separate column for each mailing list and wherein the designation is Y or N (yes and no, respectively) for whether or not the buyer is subscribed to the mailing list. A blank column will be interpreted as N. A mailing list will automatically be created for each mailing list (the description for the mailing list will be MAILING LIST 1, MAILING LIST 2, etc.). For records with a Y indicator, the buyer will be subscribed to the mailing list.
Mailing List Code 1-10 – These fields are designed for customers importing a list of buyers where there is a separate column for each mailing list and wherein the “Code” of the mailing list is included in the column instead of Y or N. Examples might be ANTIQUES, BOATS, or VEHICLES. A mailing list will automatically be created for each unique mail code included in your import file and the buyer will be subscribed to this mailing list.
9. When you have finished adding available fields in the order that matches your spreadsheet, click the Next Step button.
10. Review the field mapping. Place a check mark in the Skip First Row When Importing checkbox if your header row is showing on the import grid. Click the Next Step button.
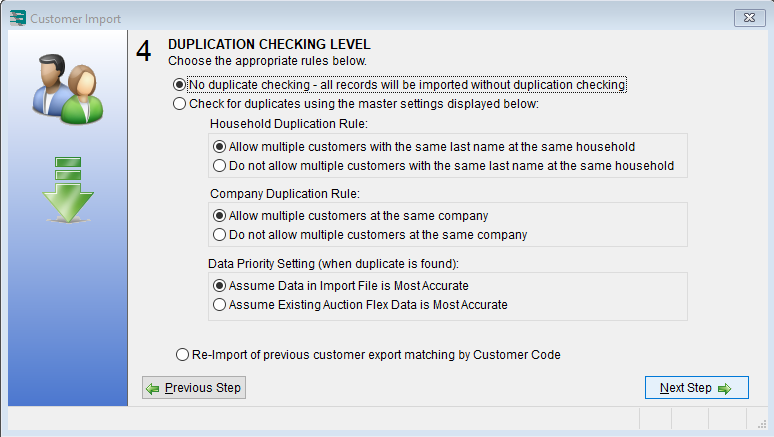
11. On the Duplication Checking Level panel, click the radio buttons that correspond to your preferred duplication checking levels. When you’re finished, click the Next Step button.
12. On the Import Customers panel, click the Import Customers button.

