Upload To HiBid From Auction Flex
Auction Flex allows you to easily upload your catalog and take bids via the internet. Use the following steps to familiarize yourself with the Auction Flex internet uploading process.
1. On the Auction Flex toolbar, click the Auction menu and select Upload Auction To HiBid. (You can also upload from the Auction Lots & Preview or Auction Setup areas.)

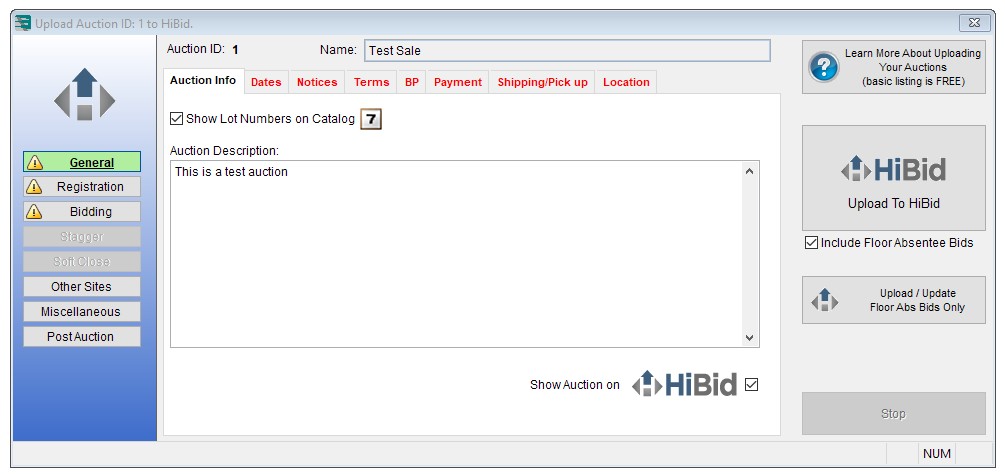
2. Click the General button. This provides access to the following options:
- Adjust important auction information and dates.
- Opt to show the final lot numbers and whether or not to make the auction visible on the HiBid.com website.
- List the terms and conditions for the sale.
- Set the buyer’s premium with a short explanation.
- List the payment options and show how shipping and pickup are handled.
- Set the location where the auction is being held.
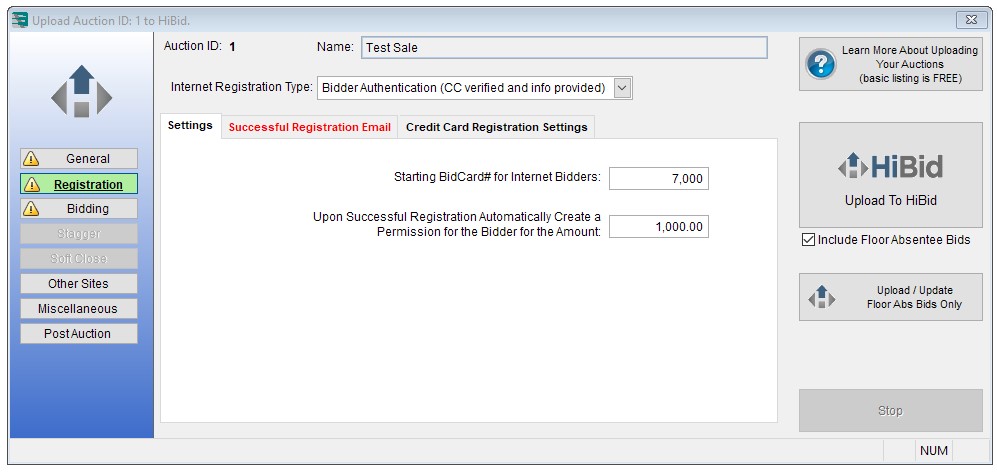
3. Click the Registration button. This provides access to the following options:
- Set Internet Bid Registration Type.
- Required Last CC Authorization In Days. If you choose Registration With Credit Card Info, a fee could be assessed per the IWS agreement. This charge is based on the number of bidders that need authorization for that auction. You can limit the number of reauthorizations and fees by adjusting the Request Last CC Authorization In Days field. The longer you leave a credit card authorized (default is 180 days), the less of a chance that you would need to reauthorize that card, but there is a greater potential for canceled or maxed cards. You can use this feature to register bidders online for traditional auctions, as well, by not enabling internet bidding.
- Allow Registration With MasterCard, Visa, American Express, Or Discover. Only check the credit cards you will accept. If you don’t accept Discover, for example, then don’t allow someone to register for your auction with a Discover card.
- Upon Successful Registration Automatically Create A Permission For The Bidder For The Amount. The purpose of having a bidder register for your auction with a credit card is so they don’t have to wait to leave their bids. This field permits you to limit how high of a bid a bidder can leave without your having to edit a specific bidder record and further increase that bidder’s bid(s). Most customers set this to 9,999,999.99 as they don’t need to limit the bidding. However, if there are a few extremely high-end items in your auction and you want to ensure that only highly qualified bidders are allowed to bid on it, this option will facilitate that requirement.
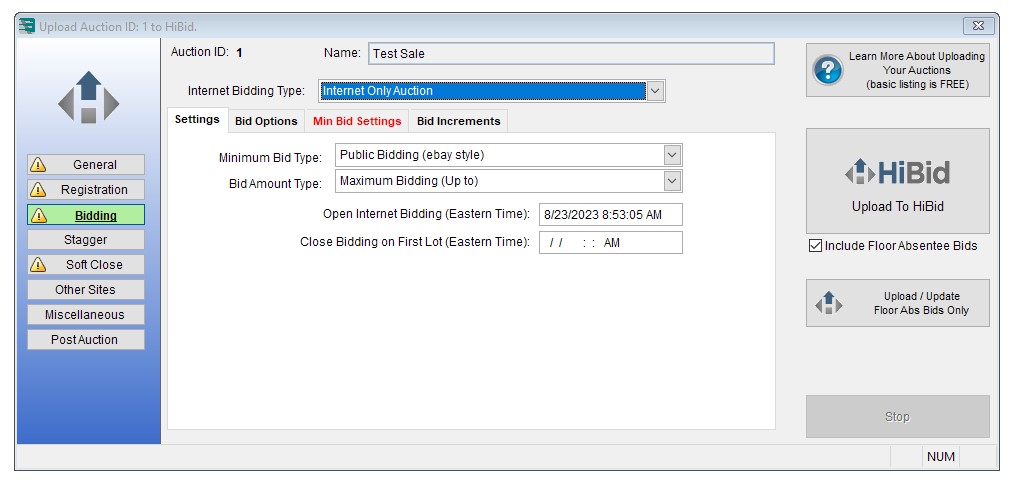
4. Click the Bidding button. This provides access to the following options:
- Internet Bidding Types, including Absentee Bidding, Internet-Only Auctions, and Webcast Auctions.
- Minimum Bid Types, including Public and Silent.
- Bid Amount Types, including Maximum and Flat. Maximum bidding means the bidder is bidding up to the amount the bidder enters. Flat bidding means he bidder is bidding on the actual amount the bidder enters.
- Open & Close Bidding Date & Time in Eastern time.
- Showing the Immediate Bid Status—that is, whether a bidder has won or lost, and the amount.
- Times the money or one money option for lots with multiple quantities.
- Show Reserved Status of whether the lot has met the reserve price. NOTE that the reserve amount is never disclosed.
- Show confirmation page with Buyer’s Premium—that is, the bidder will see the amount bid with the included premium on the confirmation page.
- Bid increments are available directly on the Bid Increments tab. Increments can be adjusted, after which bids can be forced to conform to your new increment schedule. When the auction is uploaded, the increments will be applied. NOTE that each auction may have its own individual bid increments.
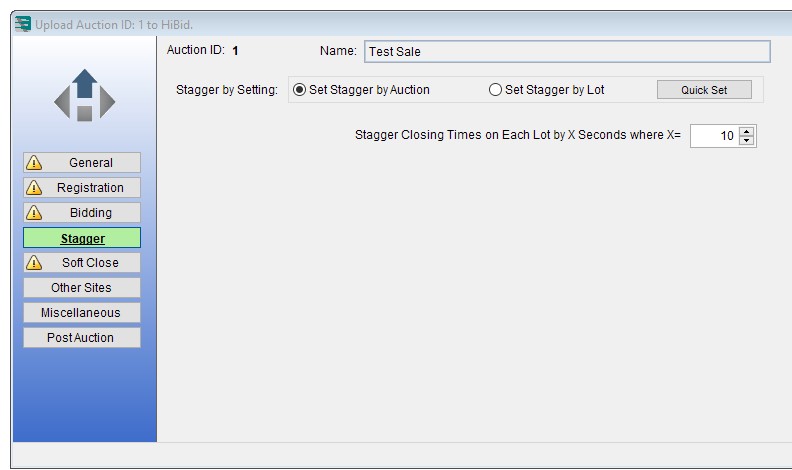
5. Click the Lot Stagger button. This provides you with the option to space out the closing of your auction lots. Setting a stagger with close subsequent lots after the first by a specified amount in seconds.
For example, if you choose 10 seconds and your auction comprises 100 lots, then the last lot will close 1,000 seconds after the first lot closed.
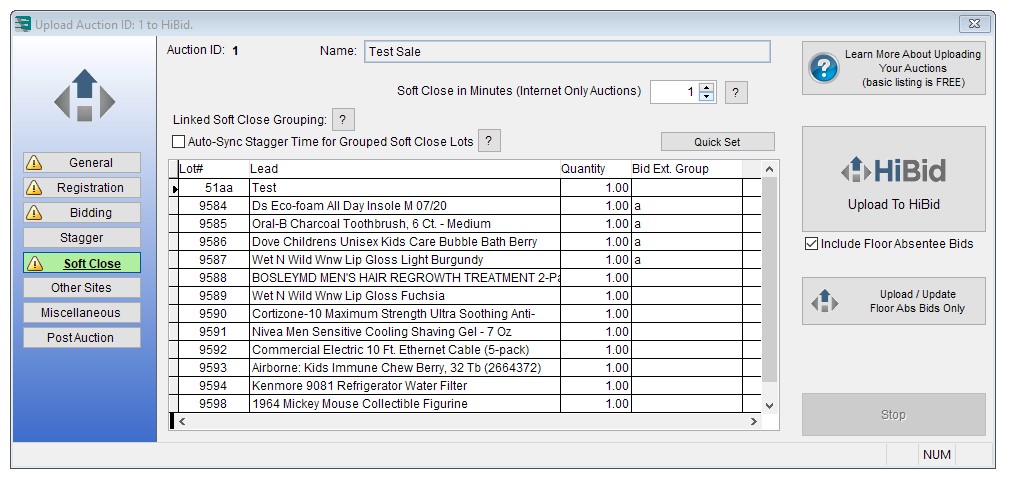
6. Click the Soft Close button. This provides you with the option to prevent a last-minute bidder from “sniping” a lot away from a previously active bidder. By setting a soft close for your lots, any bid entered during the time selected will extend the bidding for that lot by that amount of time.
For example, by setting a Linked Soft Close Group for a bidder that is bidding on a “Tractor,” with all tractors linked, the auction will extend bidding for all tractors I the auction if one tractor is affected by the soft close feature.
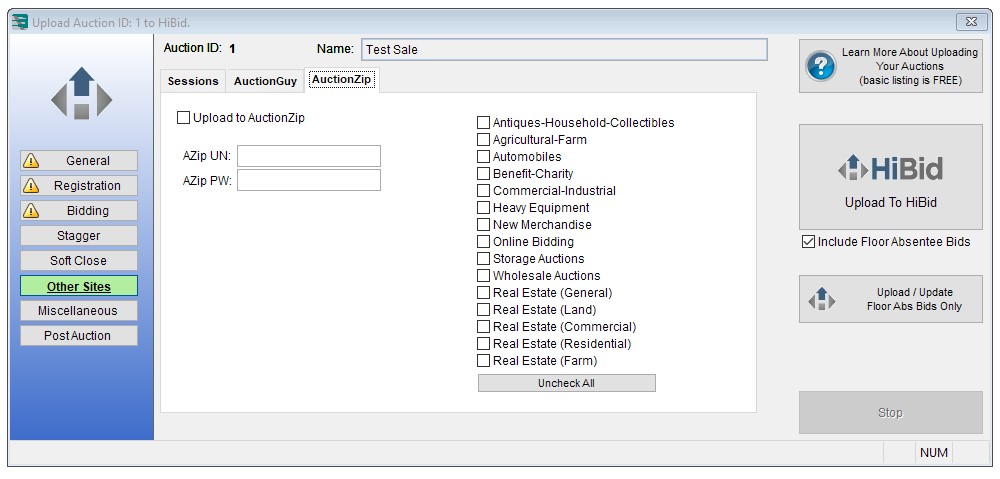
7. Click the Other Sites button and select the AuctionZip tab. AuctionZip allows you to upload auction information to AuctionZip.com using your existing AuctionZip login information. If you don’t have such a login, you would need to create one prior to using this feature. AuctionZip can require information in the description field, and the date must be set to a future date.
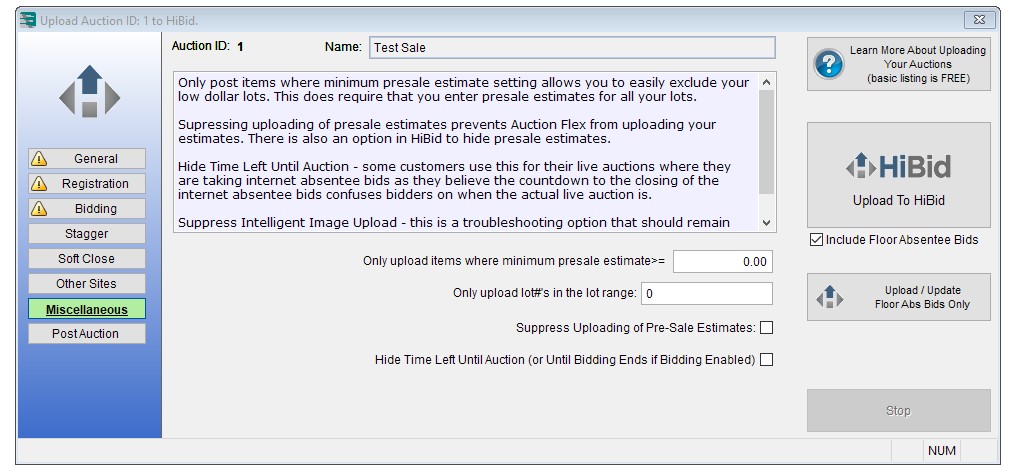
8. Click the Miscellaneous button. The window will then have the option descriptions listed toward the top, with details about each setting.
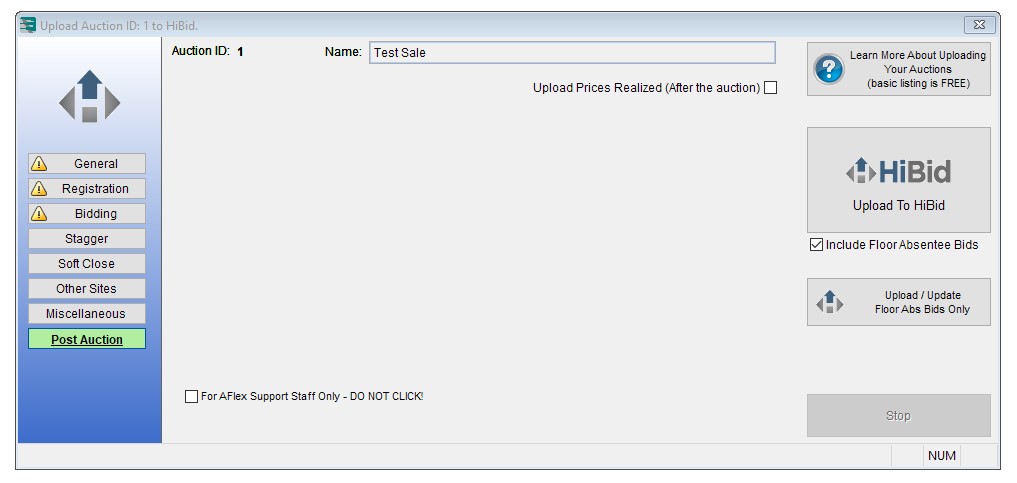
9. Click the Post Auction button. This allows you to show the prices realized after an auction. Simply choose the options that best suit your needs, make sure your items have been invoiced within the Auction Flex program, and re-upload the auction.
CAUTION: Do not click the Upload Prices Realized (After The Auction) checkbox until after the auction has completed.
