Configuring your Network Settings
All computers should be hardwired using Ethernet or CAT5 crossover cables. Do not network computers over WiFi, as this is the leading cause of data corruption.
ON ALL COMPUTERS:
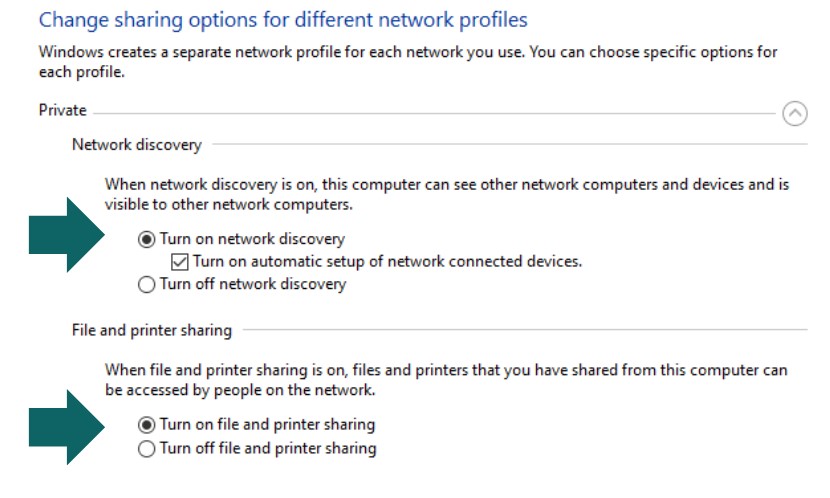
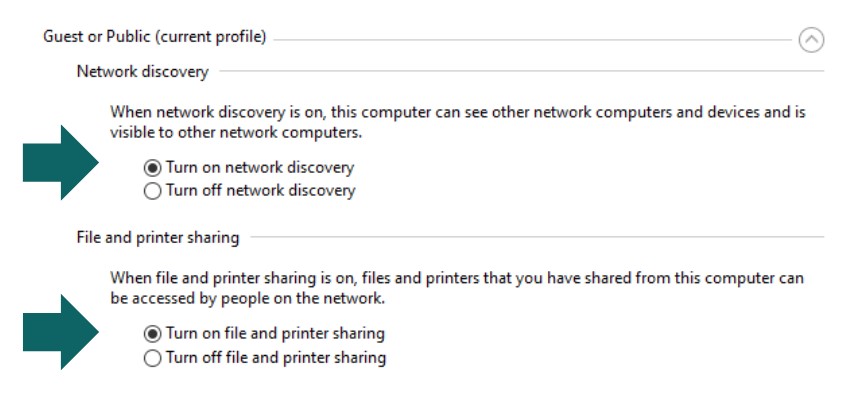
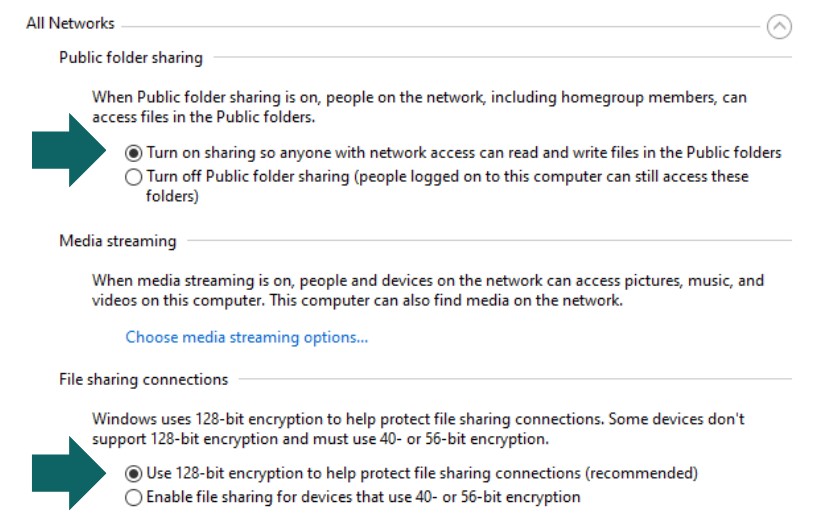
Go to the Control Panel > Network and Internet > Network and Sharing Center. Then click ‘Change Advanced Sharing Settings‘ on the left side. Under each profile (Private, Public, All Networks) make sure that all of the options are selected to “on” except for Password Protected Sharing; it should be off.
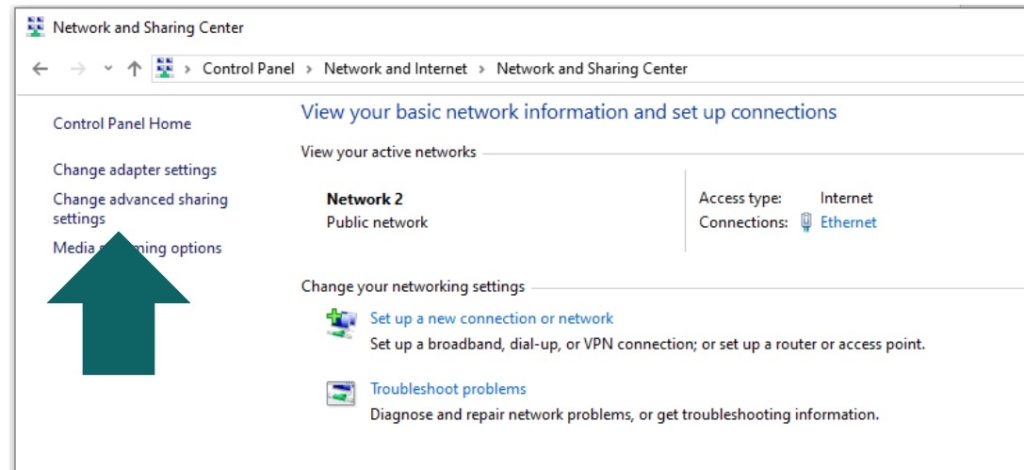
Note: While these settings may appear different in Windows 11, they function the same.
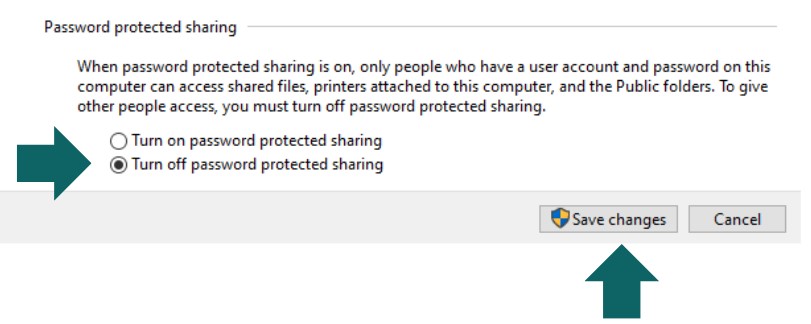
Firewalls & Network Status
Ensure all third-party firewalls are either turned off or have exceptions for all Auction Flex files. Examples of third-party firewalls include Norton, McAfee, and Kaspersky.
Configuring your Network Settings Continued…
Ensure the network status on all workstations is set to Private rather than Public. To change this, go to your Internet and Networking settings > Network Status > Properties, and change the status to Private.
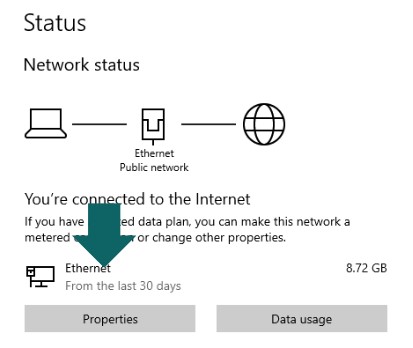
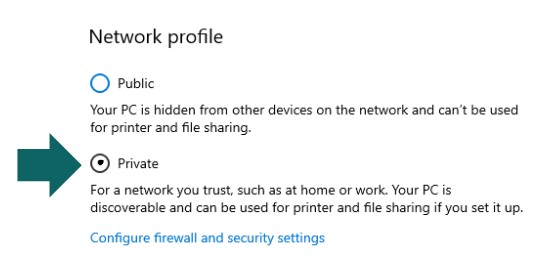
PRIMARY WORKSTATION ONLY – Sharing the Auction Flex Folder
- Open File Explorer, select This PC, and then navigate to the C drive.
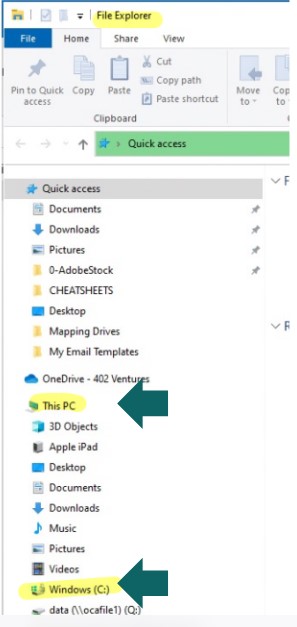
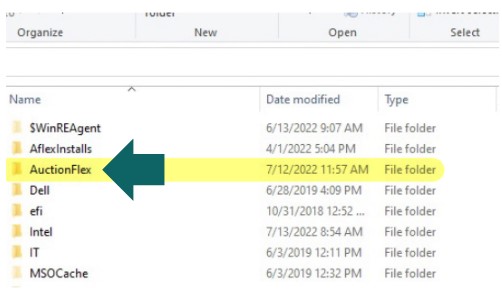
- Right click on the Auction Flex folder and click on Share With/Give Access To, then select “Specific People”.
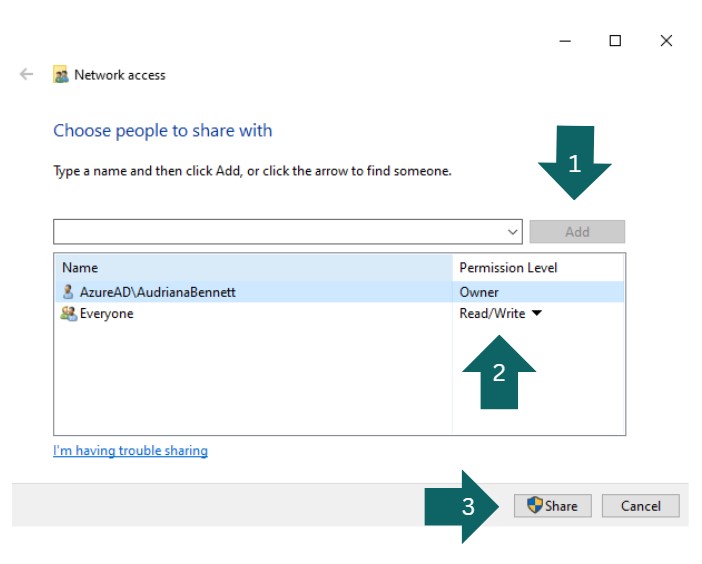
- In the drop-down menu under Specific People select “Everyone” and click add. Make sure the “Everyone” selection has “Read/Write” status. Then click ‘Share’.
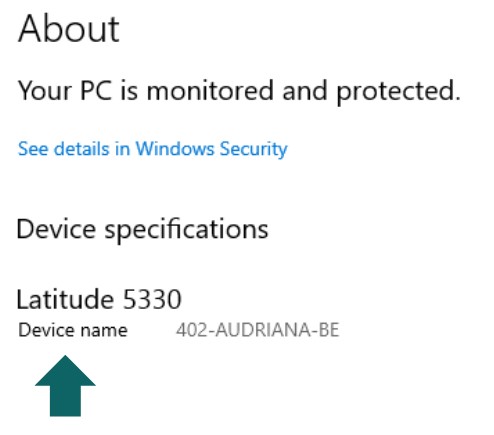
- Check the name of the primary computer. Right click on the C Drive and go to “Properties” in the drop-down menu. You will see the computer’s name in the new window: write this down… It will come in handy later…
ON THE SECONDARY COMPUTERS
Now on the secondary, open the File Explorer and go to “Network” on the left. Double click the primary computer’s name, and you should see the Auction Flex folder you shared earlier. Right click on this folder and select ‘Map Network Drive’ in the drop-down menu.
Open File Explorer, select This PC, and choose any drive. However, it is best to select the X drive, as Auction Flex will automatically connect to that drive.
If the primary computer’s name isn’t showing up under the Network on the secondary, you can map it manually:
- Click on This PC on the left in the File Explorer
- Now at the very top of the page, click ‘This PC’.
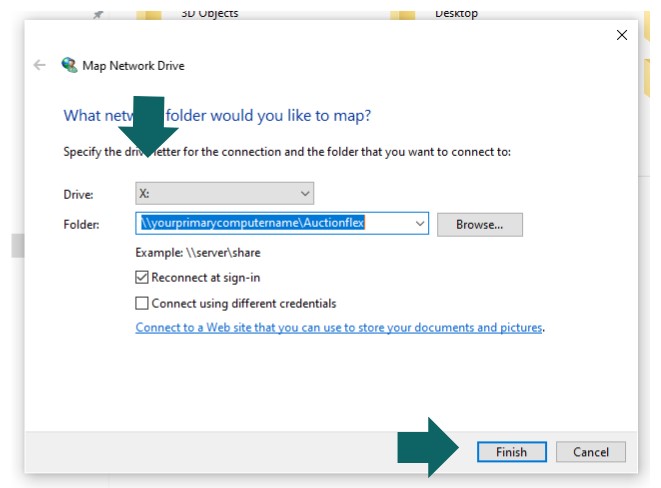
- Double click “Map network drive” icon. A new window should appear, and you will need to select a letter to use for the drive.
- Then, in the “Folder” field, type \\yourprimarycomputername\Auctionflex
- Hit enter, then press Finish.
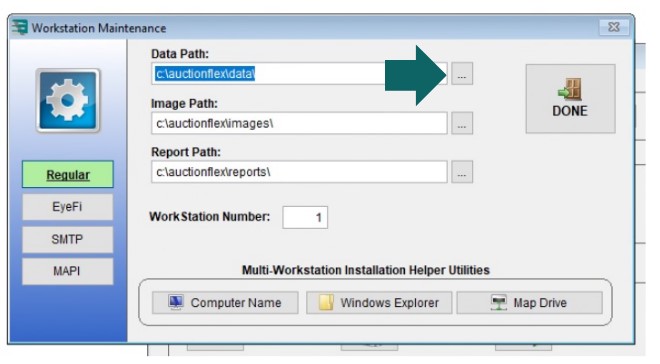
Open Auction Flex on the secondary computer. If an error occurs, prompting you to view workstation settings, click Yes.
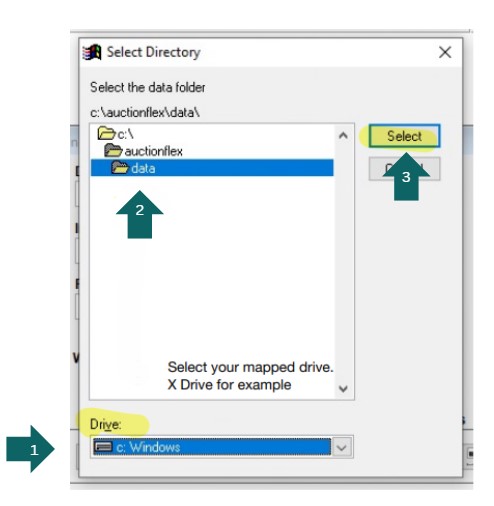
Click the three dots next to the Data Path. In the new window, select the drive letter of your mapped drive from the Drive drop-down menu at the bottom. Then, select the Data folder under your mapped drive at the top.
Click Okay to complete the process, and Auction Flex should open.
Repeat all steps on the secondary on any additional secondaries.
If your mapped drive (X:/AuctionFlex) was previously set up on the secondary’s but it disconnected:
Open File Explorer on the secondary computer, click ‘This PC’ on the left, and locate your mapped drive with a red X. Double-click the red X to reconnect it. If the Auction Flex folders/files appear and the red X disappears, the drive has successfully reconnected.
If you receive an “Unable to reconnect network drive” error, check the Advanced Network and Sharing settings as described earlier. Windows updates often change these settings, especially Password Protected Sharing.
Open Auction Flex on the secondary computer. If it errors out and prompts you to view workstation settings, click Yes.
Click the three dots next to the Data Path. In the new window, select the drive letter for your mapped drive from the Drive drop-down menu at the bottom. Then, select the Data folder under your mapped drive at the top. Click Okay to finish. Auction Flex should now open.
Repeat these steps on any additional secondary computers.
SMB2 Enabling & Disabling
The following steps should only need to be done from the secondary computer if it is unable to see the primary computer on the network.

