Adding A Footer To A Settlement
The Customer Settlement report is typically added to your Favorites section by default. If it’s not already there, you can click the button below to learn how to add it. Once the report is in your favorites, you can edit it to include a custom footer.
This footer can be used to display important messages for your winning bidders, such as payment instructions, or to add your company information for a more professional touch.
Learn More:
Edit Report Screen
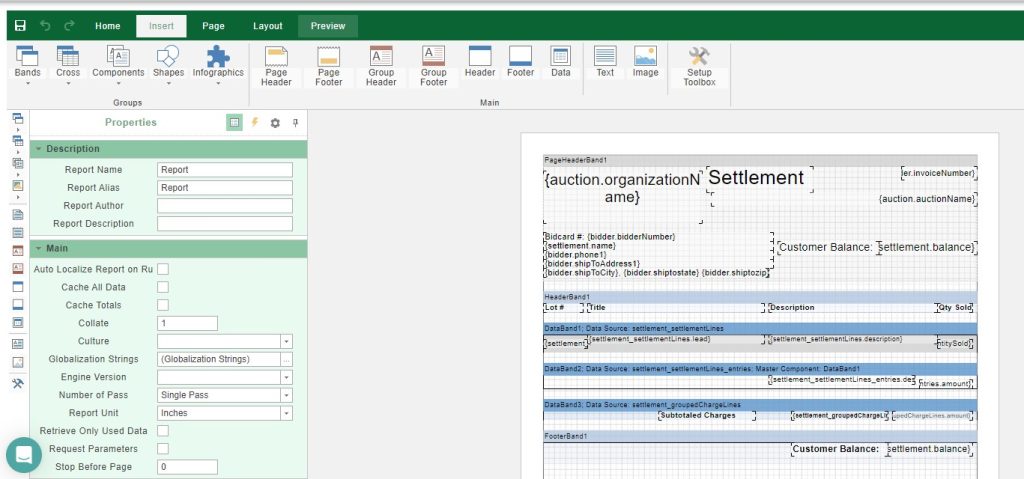
Once you click the Edit button to modify the Customer Settlement, an editor window will pop up. This editor allows you to make adjustments to the report, such as adding custom footers, logos, or other personalized content.

- In the editor’s top menu, select the Footer icon to begin customizing the footer section of your report.

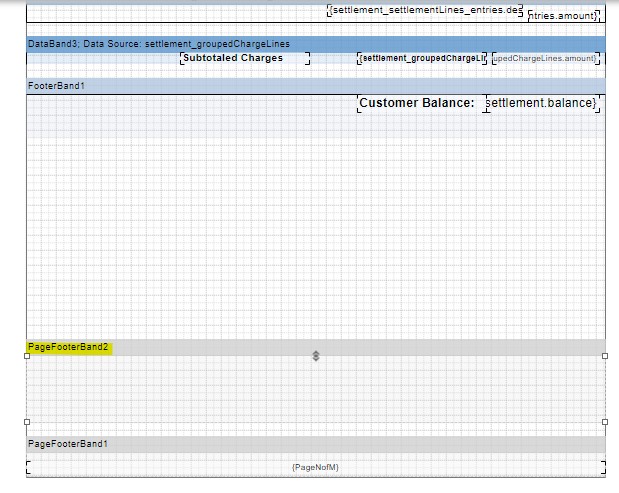
- Use your mouse to drag the Footer Box to the bottom of the report. This will ensure that the footer appears in the correct location, ready for you to add text or other custom elements.
Footers Overview
When working with footers in reports, it’s important to understand the distinctions between the different types and their use cases:
1. Page Footer
- Purpose: Displays at the bottom of each page in the report.
- Common Use: Best for adding consistent elements like signature lines, page numbers, or disclaimers.
- Note: This is the footer you’re most likely to use.
2. Group Footer
- Purpose: Appears at the end of a group of data, providing a summary or additional information specific to that group.
- Common Use: While not frequently used in most reports, it can be helpful for grouped data like categories or sections within the report.
3. Footer
- Purpose: Placed directly below a data band, often to display totals or aggregate values for the data within that band.
- Common Use: Ideal for financial reports, invoices, or summaries where totals are needed after specific data sections.

- After adding the footer band, scroll back to the top of the editor. In the menu options, click on the Text icon to insert a text box into the newly created footer band. This will allow you to add any custom text or information you need within the footer area.

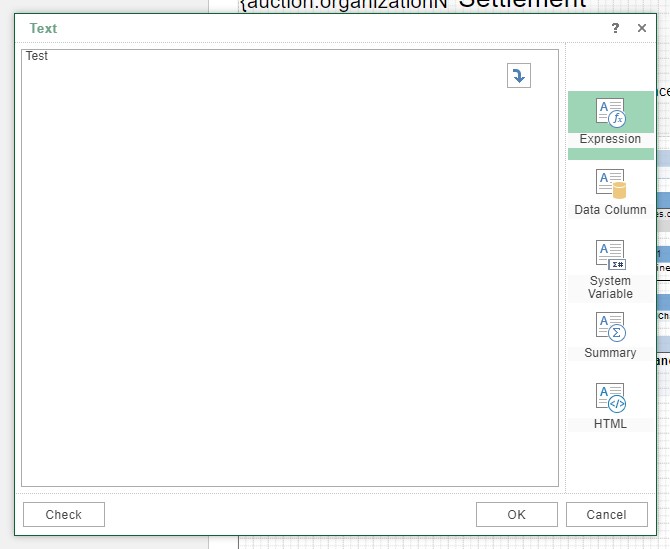
- Use your mouse to drag and drop the Text Box into the footer band. Once placed, a text box will appear where you can type the information you’d like to include on the settlement. After entering your desired text, click the OK button to save your changes.

- After clicking the OK button, the information you entered will immediately appear on the report editor screen, allowing you to see how it looks within the settlement.

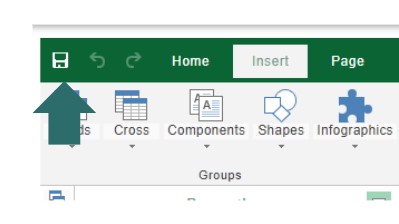
- To save your changes to the report, click the Save icon located in the top left corner of the screen. This ensures your edits are applied and the report is updated with your customizations.


