Live Auction Process
This section provides a comprehensive guide to the entire live auction process in AF360, covering every step from start to finish.
Pre Auction
Auction Day
5. Live Auction Check-In
If you’re conducting a live auction, follow these steps to check in your bidders:
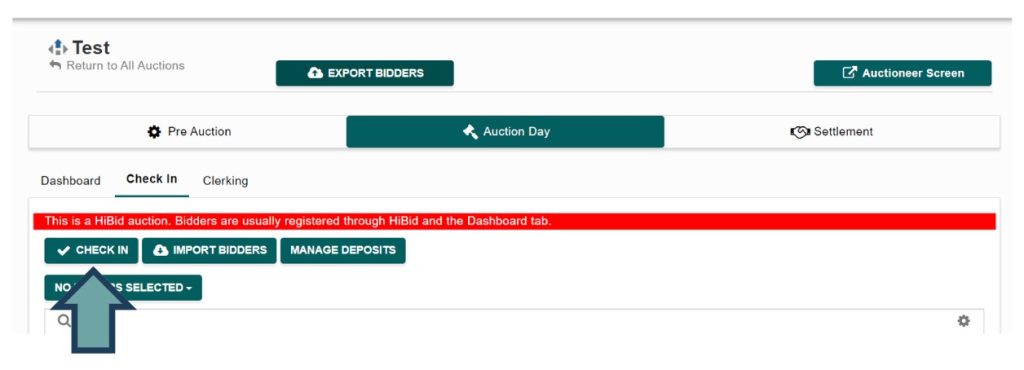
- Navigate to Auction Day > Check In.
- Click the ‘Check In’ button on the left side of the screen.
For internet-only auctions, bidders are automatically checked in, so no additional steps are needed.
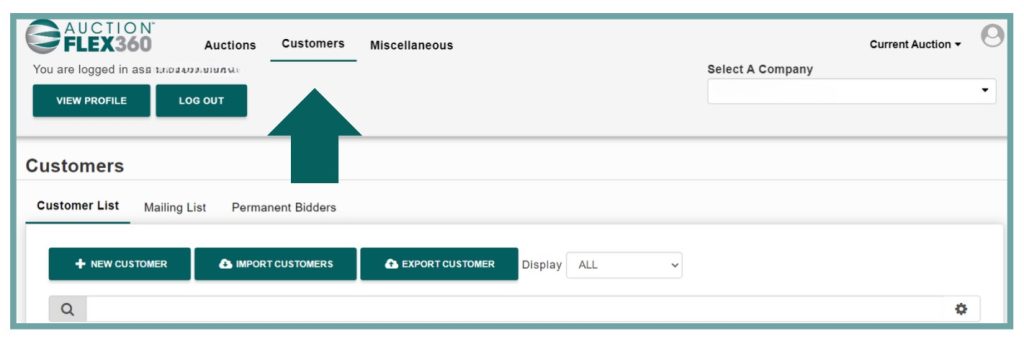
Once a bidder has been checked into an auction, their information will be saved in your Customer Center, which can be accessed from the top menu in AF360.
Optional: Print Bid Cards
We’ve added a convenient Print Bidcard option to the Check-In area for those using AF360 for live auctions. Whether you’re running a HiBid Absentee, Webcast, or Live (Traditional) auction, you’ll notice new options during the check-in process.
- If you want a preview and print window to open in a new tab for each bidder as they’re checked in, simply keep the Prompt Print Bid Card on Check-In box checked.
- This feature also applies to permanent bidders—if you check in all your permanent bidders with this option enabled, it will automatically prompt the printing of all their bidcards.
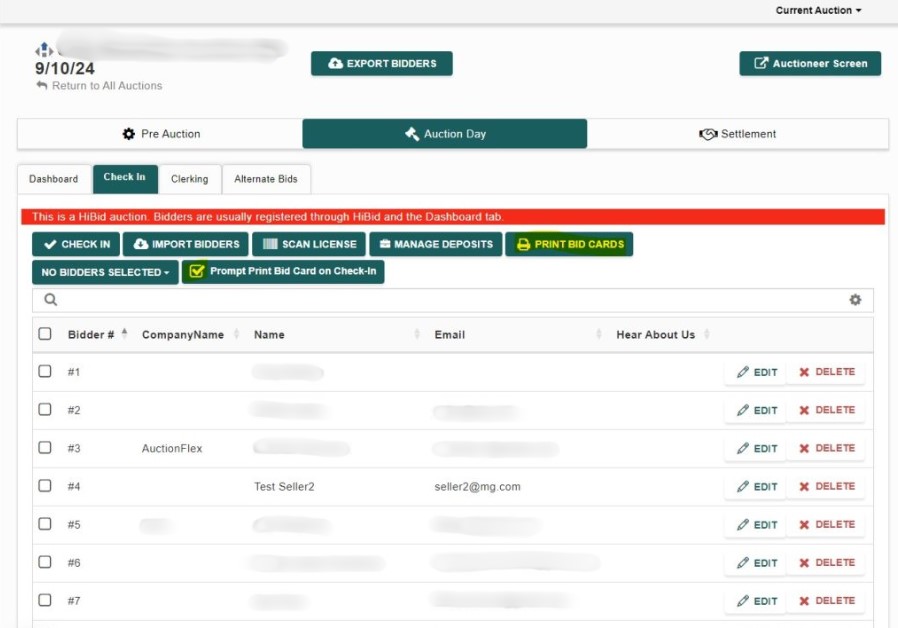
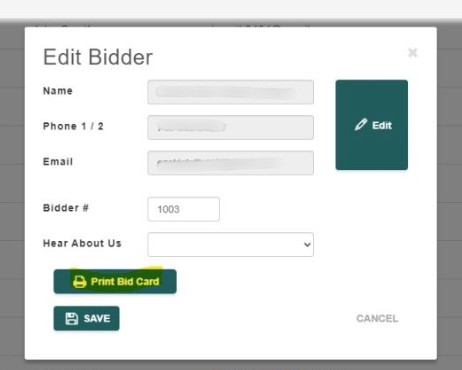
- If someone needs a new bid card, you can click Edit next to the bidder and Print Bid Card button.
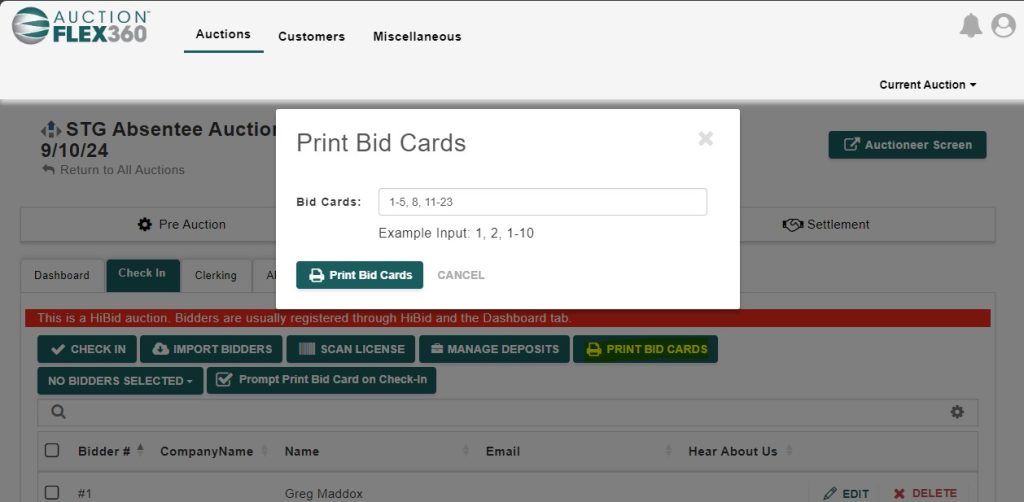
- You can also print a single bid card or multiple from the Print Bid Cards button at the top.
6. Clerking for Live Auctions
If you’re conducting a live or webcast auction, you’ll need to manually manage your bids. This can be done within the clerking grid of AF360.
- Navigate to ‘Auction Day’ , then go to ‘Clerking.’
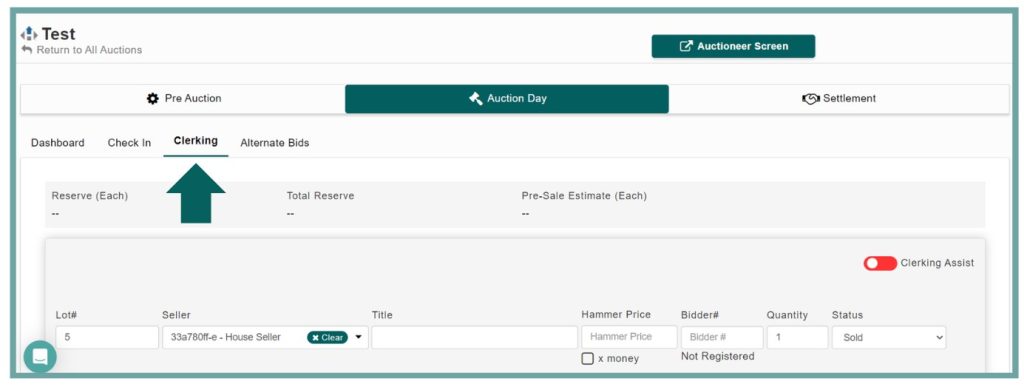
If the auction is pre-cataloged, simply enter the Lot # to auto-populate the lot information. Next, input the Hammer Price and Bid Card Number, and then save the clerking activity.
- If the auction is not pre-cataloged, you’ll need to clerk on the fly. This requires entering the Lot #, Consignor, Lot Title, Hammer Price, and Bid Card number manually.

To edit a clerking activity, simply scroll down to view and make changes to each clerked lot.

Post Auction
7. Processing Payments
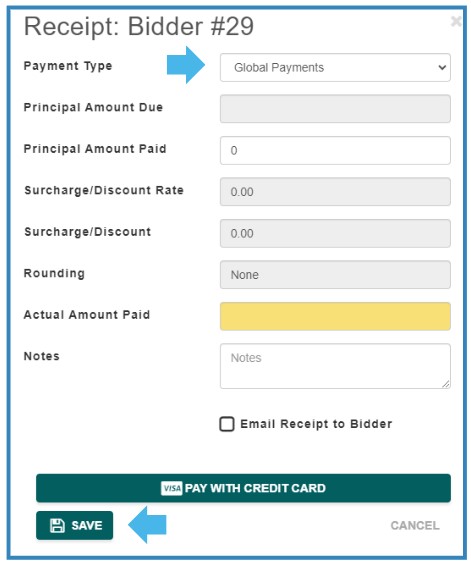
- To mark an individual’s settlement as paid with a balance of $0.00, simply add a receipt to the bidder’s settlement. To do this, click on ‘View Settlement’ next to the bidder’s settlement.

- Select ‘Add Receipt’ on the right, then choose the payment type the bidder is using.

- Review all the charges to ensure they are correct, enter the amount paid, and then select the appropriate option based on the payment method. Then save your changes.
