Lots Details
The Lot Details page offers detailed options specific to each lot, including sections for Lot Info, Lot Media, Category, Lot Links, Description/Estimate/Reserve/Start Bid, Accounting, and Clerking.
Lot Info
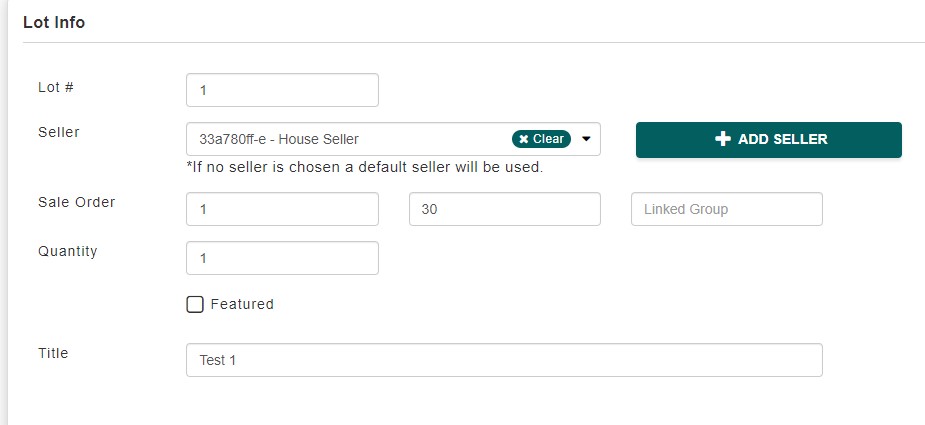
The following image shows a section labeled Lot Info with several fields related to setting up a lot in an auction system. Here’s an explanation of each setting:
- Lot #: This field represents the unique number assigned to the lot within the auction. The lot number helps in identifying and organizing items.
- Seller: This dropdown field allows you to select or assign a seller to the lot. If no seller is chosen, a default seller will be used as indicated in the note below this field.
- Add Seller: This button enables you to add a new seller to the auction system or assign a seller to this specific lot.
- Sale Order: The fields here define the order in which the lot will appear during the auction. The first field seems to represent the starting order, and the second field (after the dash) might represent the end or a grouping order.
- Linked Group: This optional field allows you to link this lot to a group, which could be used to group related items together for organizational purposes during the auction.
- Quantity: This field specifies the number of items included in the lot. For example, if you have multiple identical items being sold together, you would indicate the quantity here.
- Featured: This checkbox allows you to mark the lot as “Featured,” which might highlight it in the auction, making it more prominent to potential buyers.
- Title: The title field is where you enter a brief description or name for the lot, such as “Test 1” in the example. This title is often displayed to buyers when browsing the auction catalog.

Lot Media
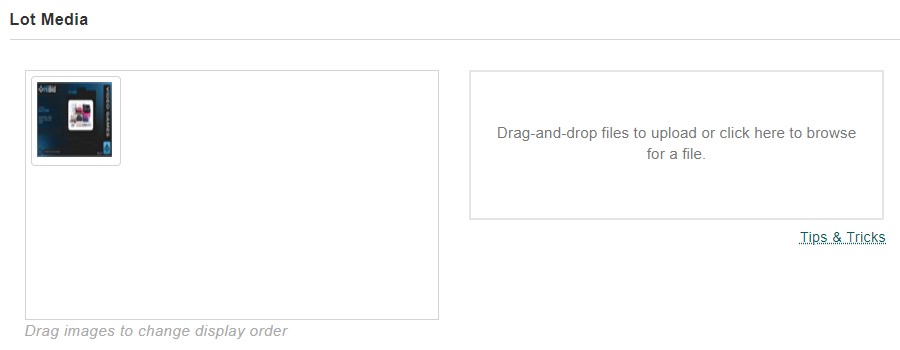
The Lot Media section enables you to easily add images to a lot by dragging and dropping them into the designated area.

Category
The Category section allows you to organize and track your lots by category in AF360. However, please note that HiBid will automatically categorize your lots upon upload.

Lot Links
The Lot Links feature allows you to add external URLs that are associated with a specific lot. This could include links to more detailed information, additional images or videos, or related resources. Each link can be given a description to clarify what the URL leads to.
To add a link, simply click the + ADD button, enter the URL and description, and it will appear in the list.

Description / Estimate / Reserve / Start Bid
The following image shows a form with fields related to setting up an auction or bidding process. Here’s what each field represents:
- Description: This is where you provide details about the item or lot that is being auctioned. In the image, the description is set as “Description 1.”
- Estimate /ea (Min – Max): These fields are for entering the estimated value of the item. The “Min” field is for the minimum estimated value, and the “Max” field is for the maximum estimated value. This gives potential bidders an idea of the item’s worth.
- Reserve /ea: The reserve price is the minimum amount that the seller is willing to accept for the item. If the bidding does not reach this amount, the item will not be sold.
- Start Bid /ea: This is the starting bid amount. It is the minimum bid that a participant can make to start the auction. In the image, the starting bid is set at “5”.
These settings help define the parameters of an auction, ensuring that the seller has control over the minimum acceptable price while providing bidders with important information about the item’s value and starting point for bids.

Accounting
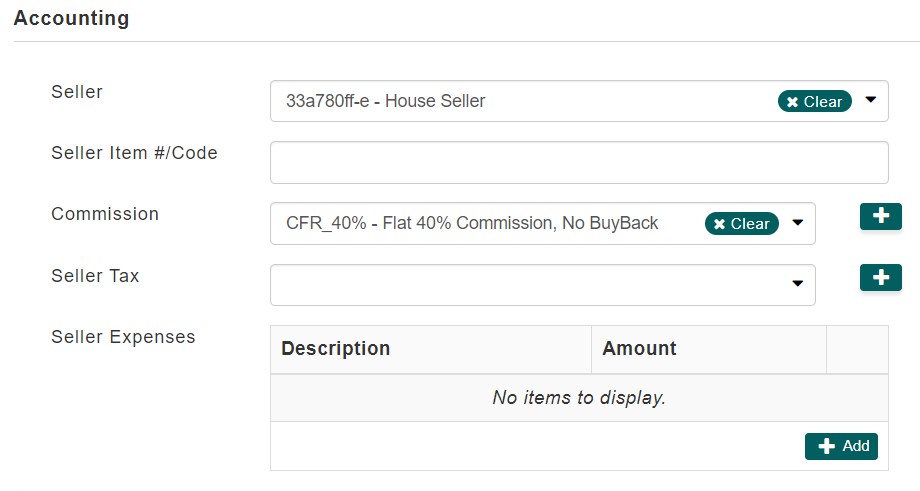
The following image displays a section related to accounting settings within AF360. Here’s what each field represents:
- Seller: This field shows the unique identifier or name of the seller. In this case, “33a780ff-e – House Seller” is selected, indicating the person or entity selling the item.
- Seller Item #/Code: This is an optional field where you can enter a specific item number or code assigned by the seller for tracking purposes.
- Commission: This field specifies the commission structure for the sale. In the image, “CFR_40% – Flat 40% Commission, No BuyBack” is selected, indicating a 40% commission rate with no option for the seller to buy back the item.
- Seller Tax: This is where you would input the applicable tax rate that the seller is responsible for. The field is currently empty.
- Seller Expenses: This section allows you to add and list any expenses that will be deducted from the seller’s proceeds. The table has columns for “Description” and “Amount,” but currently, there are no items listed.

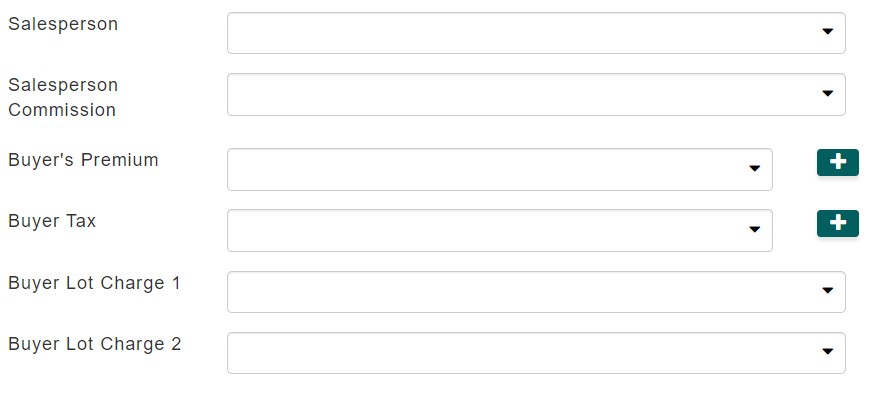
- Salesperson: This dropdown allows you to select the salesperson responsible for the transaction. The field is empty, meaning no salesperson has been assigned.
- Salesperson Commission: This field is for specifying the commission percentage or amount that the salesperson will receive for facilitating the sale.
- Buyer’s Premium: This field indicates the percentage or amount of the buyer’s premium, which is an additional charge on top of the winning bid that the buyer must pay. The field is currently empty.
- Buyer Tax: This is where the tax rate applicable to the buyer would be entered.
- Buyer Lot Charge 1 and Buyer Lot Charge 2: These fields allow for additional charges that the buyer must pay for each lot. These charges might be for handling, shipping, or other fees.
These settings allow you to manage the financial aspects of an auction, including how much is charged to both sellers and buyers, how commissions are distributed, and how taxes and expenses are handled.

Clerking
The following image shows the “Clerking” section within the AF360 auction management system. Here’s an explanation of each setting:
- Status: This dropdown menu is used to update the clerking status of the item. “Not Clerked” means that the item has not yet been processed by the auction clerk. Once the item has been auctioned, this status would typically be updated to reflect that it has been sold or passed.
- Price: This field is for entering the final sale price of the item. It remains empty until the item has been successfully auctioned.
- x money: This checkbox might be used to indicate that the price entered is to be multiplied by a certain factor, typically used in auctions where the bid is per unit and the total amount is calculated by multiplying the bid by the number of units.
- Bidder #: This field is where the winning bidder’s number or ID is entered after the item has been sold. It is used to associate the sale with a specific bidder.
- Quantity: This indicates the number of units of the item being sold. In the image, the quantity is set to “1,” meaning a single unit of the item is being auctioned.
- Invoiced: This field shows whether the item has been invoiced or not. In the image, it says “NO,” indicating that the item has not yet been invoiced to the winning bidder.
- EDIT Button: Clicking this button allows the user to modify the details of the clerking information, such as updating the price, bidder number, or quantity.
- SAVE Button: This button is used to save any changes made to the clerking details. It ensures that all the information is recorded correctly in the system.
These settings are crucial for tracking the auction process and ensuring that all items are properly documented, invoiced, and associated with the correct bidders.


