Phone Bid Scheduler
The Phone Bid Scheduler allows you to quickly generate a schedule for your bank of phone bid employees. To get started:
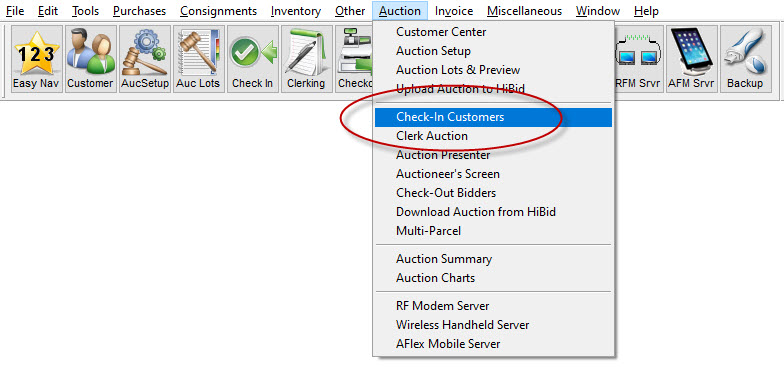
1. Click the Auction menu and select Check-In Customers.
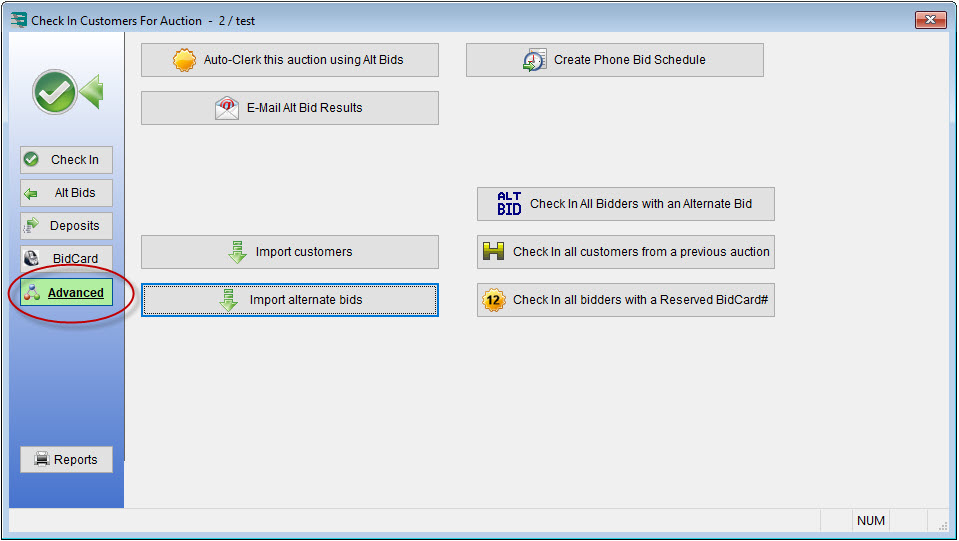
2. In the Check In Customers For Auction window, click the Advanced tab.
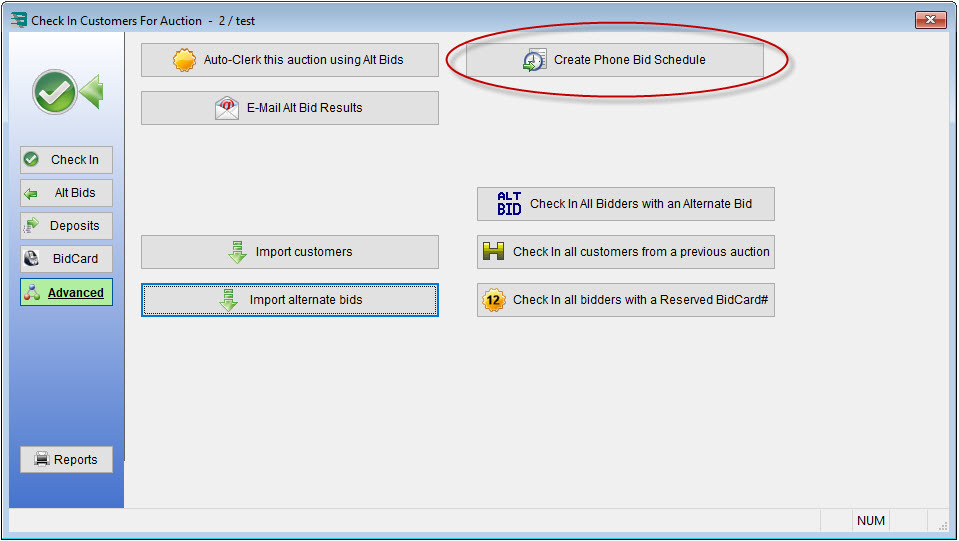
3. Click the Create Phone Bid Schedule button.
4. If you have previously created a phone bid schedule and only want to view it or make manual changes, DO NOT generate a new schedule. Instead, click the View Previously Created Schedule button, which will appear only if one has already been created in the same auction.
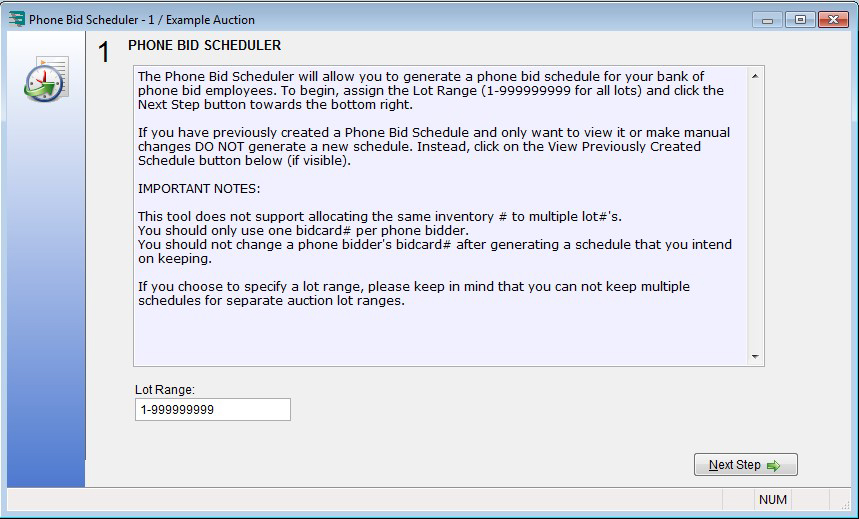
IMPORTANT NOTES:
- This tool does not support allocating a single inventory number to multiple lot numbers.
- You should only use one bid card number per phone bidder.
- If you change a phone bidder’s bid card number, you should generate a new schedule.
- The first page will highlight the guidelines listed above. After reviewing this information, click the Next Step button to start setting up your scheduler.
When you are finished, click the Next Step button.
5. In the Step 2 window, add a complete list of your phone bank employees.
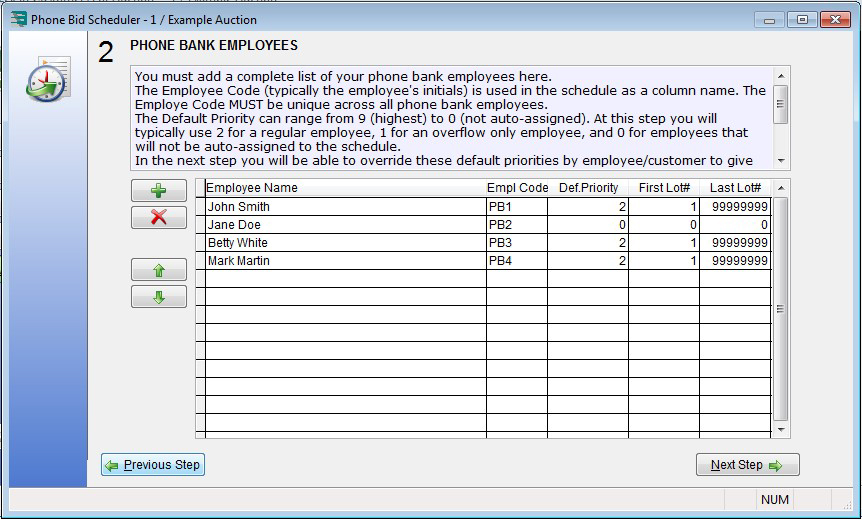
Employee Code (typically the employee’s initials) is used in the schedule as a column name. The Employee Code MUST be unique across all phone bank employees.
Default Priority can range from 9 (highest) to 0 (not auto-assigned). At this step you will typically use 2 for a regular employee, 1 for an overflow only employee, and 0 for employees that will not be auto-assigned to the schedule. Only in rare circumstances will you use anything higher than 2.
You will be able to override these default priorities by employee/customer to give preference to certain employee/customer combinations.
When you are finished, click the Next Step button.
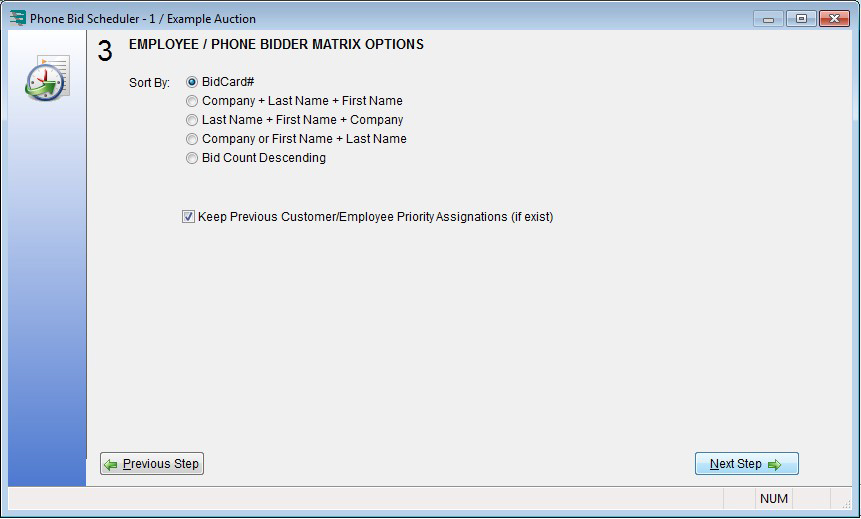
6. In the Step 3 window, select how you want your customers’ information presented in the phone bid scheduler.
For example, to have the customers’ information show with company first, then the last name, and then the first name, you would select the radial next to “Company + Last Name + First Name.
When you are finished, click the Next Step button.
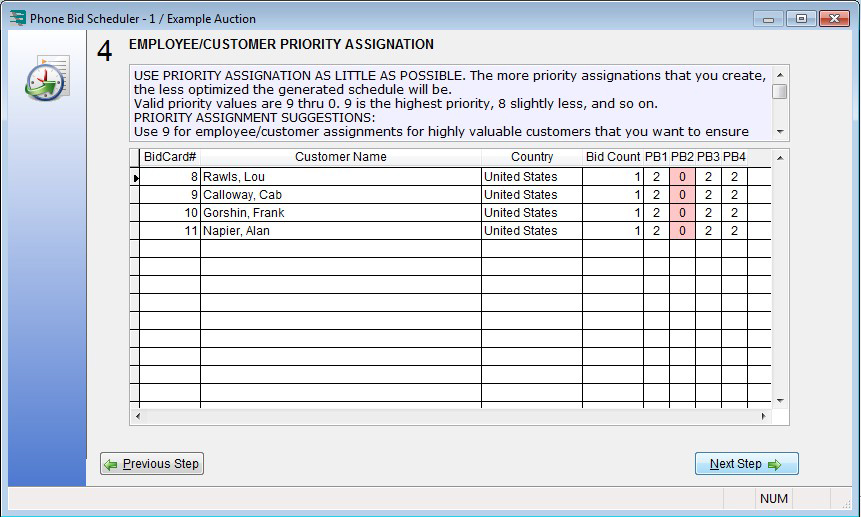
7. In the Step 4 window, set the priority for callbacks to your phone bidders.
Note:
- Better optimized schedules are achieved by assigning fewer priority assignations. The more priority assignations you assign the less flexibility the scheduling algorithm has to create an optimized schedule.
- As with employee priority, the default is 2, and you should only use higher priorities in special circumstances.
- Valid priority values are 9 thru 0.
- 9 is the highest priority, 8 slightly less, and so on.
Priority assignment suggestions:
- Use 9 for employee/customer assignments for highly valuable customers that you want to ensure talk to that particular employee (that is, for a customer who only speaks a foreign language).
- Use 8 for that next level of importance, and so on, all the way down to 2 for no special assignment consideration. 2 is the default assignment option.
- Use 1 for overflow employees only. This will allow you to have an overflow bank of employees for lots with numerous phone bidders.
- Use 0 for employee/customer combinations that are NOT allowed. A 0 priority can be useful for preventing employee/customer assignments due to constraints such as language.
When you are finished, click the Next Step button.
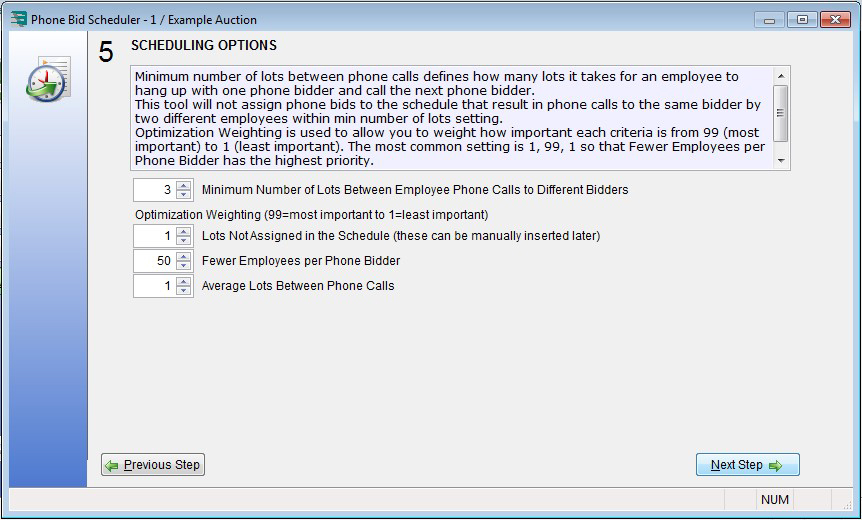
8. In the Step 5 window, establish the minimum number of lots that will be between employee phone calls to different bidders. You can also use the Optimization Weighting option to create a schedule that is based on criteria important to you. When you are finished, click the Next Step button.
9. In the Step 6 window, assign the length of time given to process the phone bid schedule.
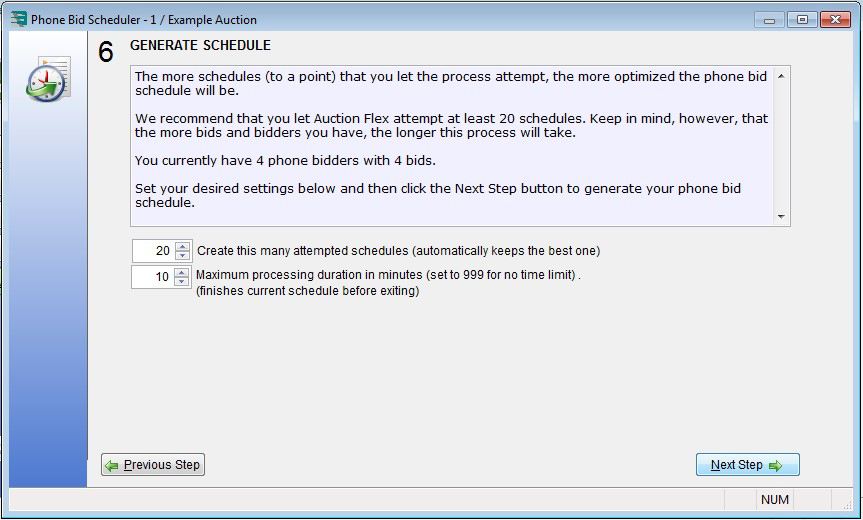
NOTE: The more time you give the scheduler to run (to a point), the more optimized the phone bid schedule will be.
When you are finished, click the Next Step button.
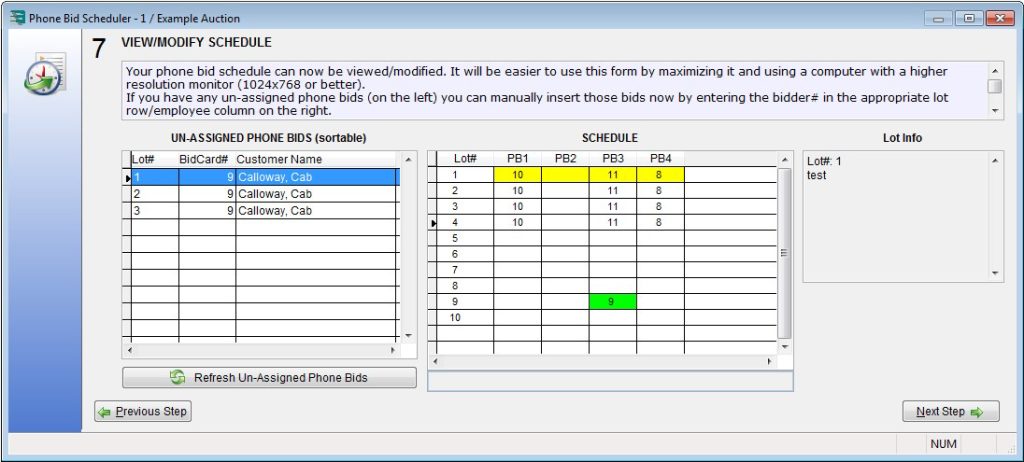
10. In the Step 7 window, you can view and modify your phone bid schedule.
Note:
- It will be easier to use this window by maximizing it and using a computer with a higher resolution monitor (1024×768 or better).
- If you have any unassigned phone bids (on the left), you can manually insert those bids now by entering the bidder# in the appropriate lot row/employee column on the right.
- When you select a row on the left in the unassigned phone bids grid, the schedule grid will automatically skip to the same lot number.
- To refresh the list of unassigned bids (useful after manually assigning to the schedule), click the Refresh Un-assigned Phone Bids button towards the bottom of the form.
When you are finished, click the Next Step button.
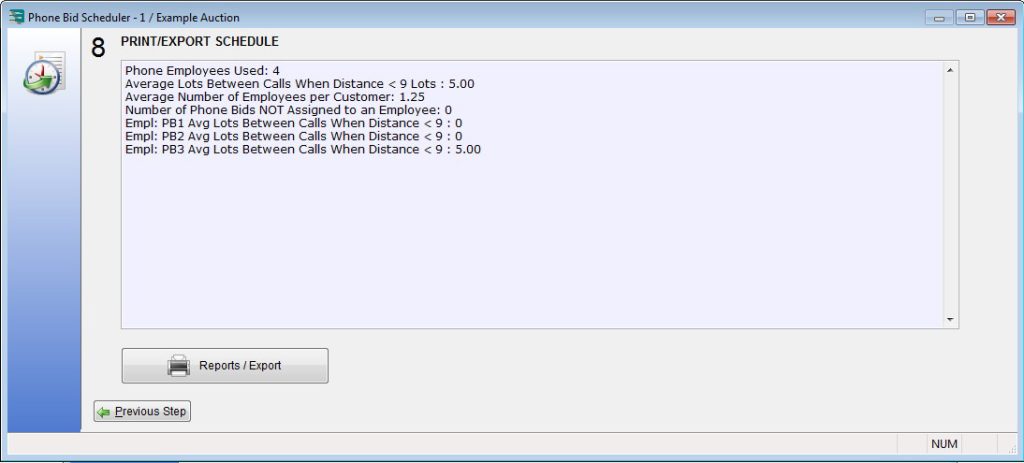
11. In the Step 8 window, you can print the phone bid schedules that you have generated. to print the schedule, simply click the Reports / Export button and then choose the desired report using the standard print dialog controls.
