Importing Lots
IMPORTANT: Before importing a catalog of information, it’s important to create a backup of your data. To do this, click the Backup button in the Auction Flex toolbar and then click the Backup Data button. Once the backup is complete, proceed with the following steps.
The Inventory Import window allows you to easily import items from a spreadsheet to multiple consignors.
1. Create and save your Excel spreadsheet.
TIP: Include lot numbers if you want items imported into an auction. If there are no lot numbers, items will be imported into inventory for use in a future auction. In this situation, you must include inventory numbers on your spreadsheet.
You must include a column for consignor codes and pre-enter those consignors in Auction Flex.

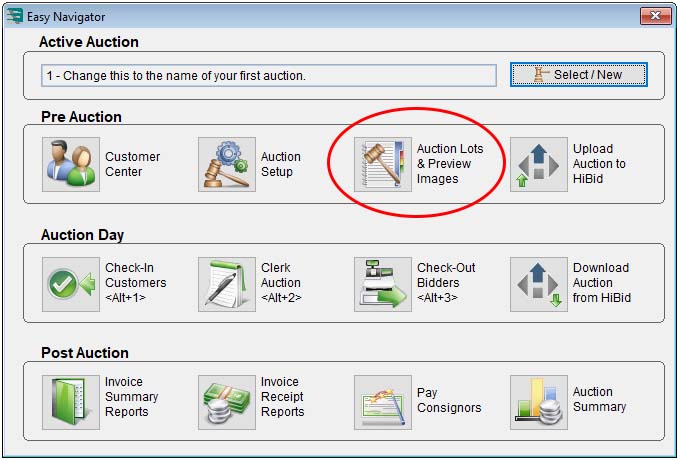
2. On the Easy Navigator screen (or Navigator toolbar), click the Auction Lots & Preview Images button.
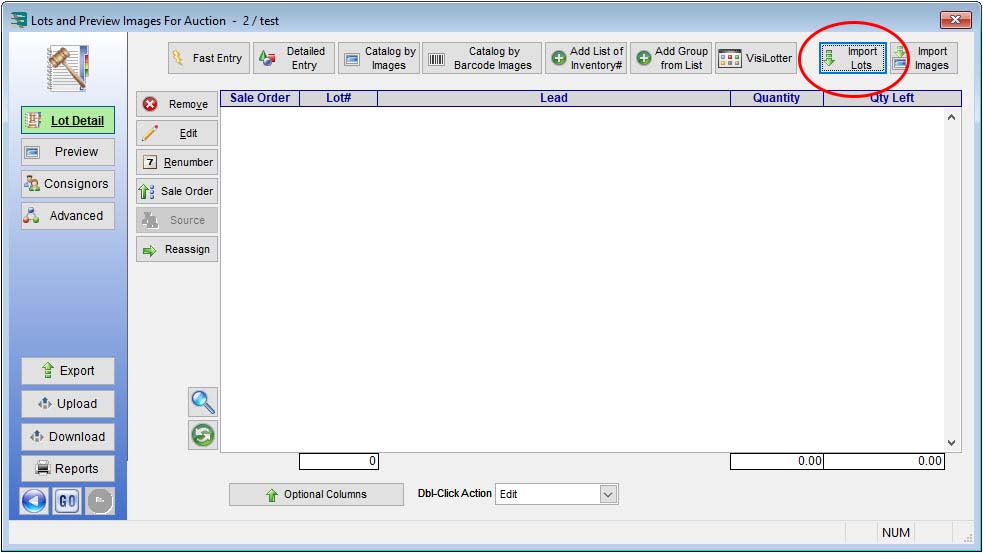
3. In the Lots And Preview Images For Auction window, click the Import Lots button.
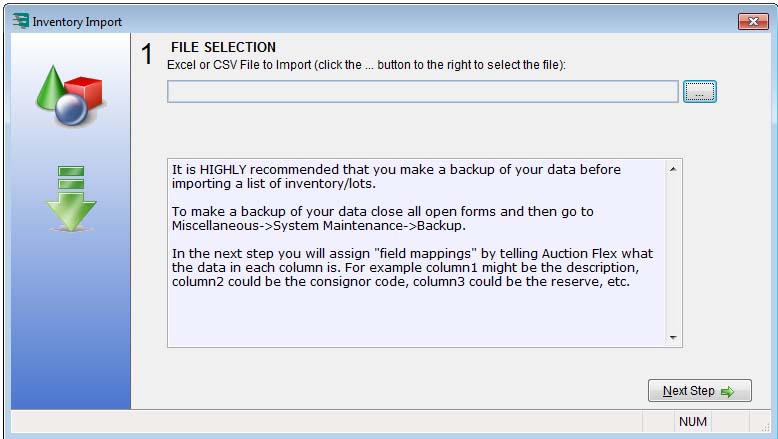
4. Provided you have already created your Excel spreadsheet containing the inventory information for your auction, click the Browse (. . .) button to locate your file, and then click the Next Step button.
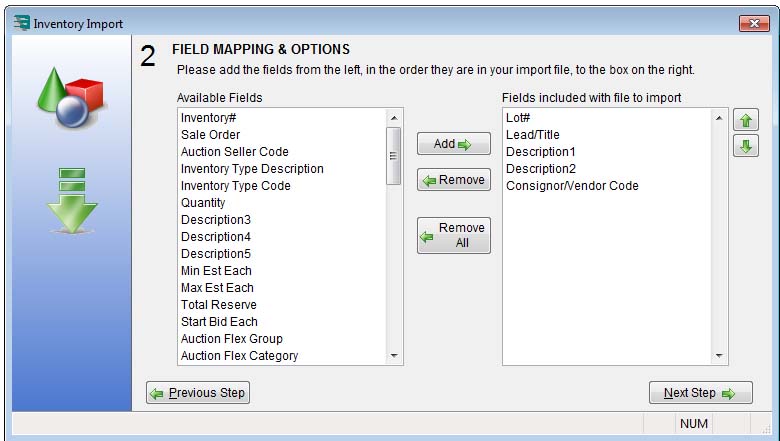
5. In the Inventory Import Step 2 window, choose the fields in the order they appear on your spreadsheet, and then click the Next Step button.
TIP: When matching your fields, remember that a spreadsheet reads from left to right (usually in the order of columns A, B, C, etc.), whereas in Auction Flex the list reads from top to bottom. In this screenshot, the Fields included for import would mean that column A is equivalent to the lot number, column B is equivalent to the lead, column C is equivalent to the description, etc.
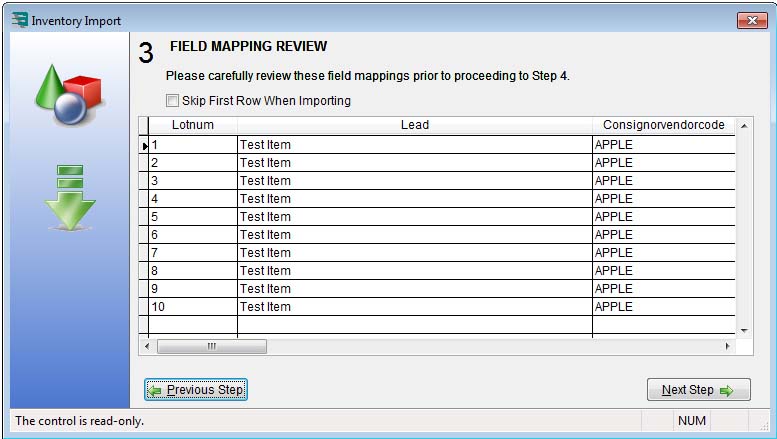
6. In the Inventory Import Step 3 window, verify that your fields are lined up correctly. If your spreadsheet includes headings, check the Skip First Row When Importing checkbox. When you are finished with this window, click the Next Step button.
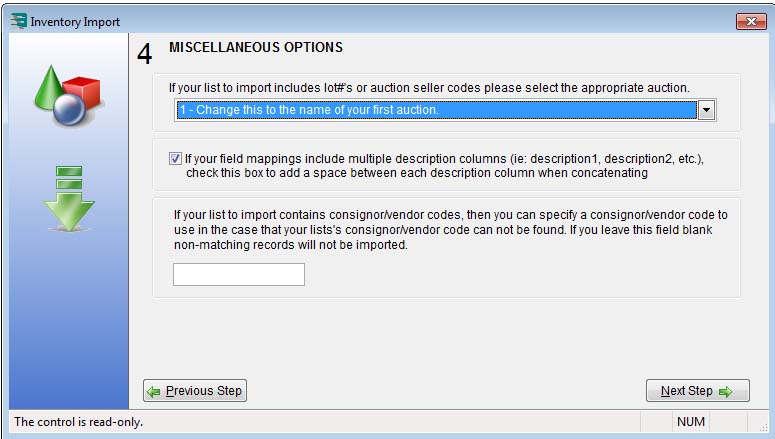
7. The Inventory Import Step 4 window displays next. Since we included lot numbers, we will choose the auction to which the items will be imported. If you did not include lot numbers, the items will be imported into inventory for allocation to a future auction. When you are finished with this window, click the Next Step button.
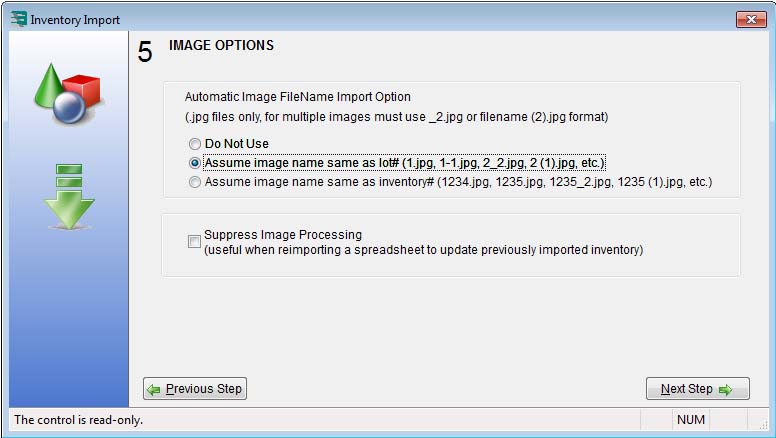
8. In the Inventory Import Step 5 window, you can opt to import images. Make sure the images are in the same folder as the spreadsheet and named according to the lot/inventory number (for example, 1.jpg, 2.jpg, etc.). When you are finished with this window, click the Next Step button.
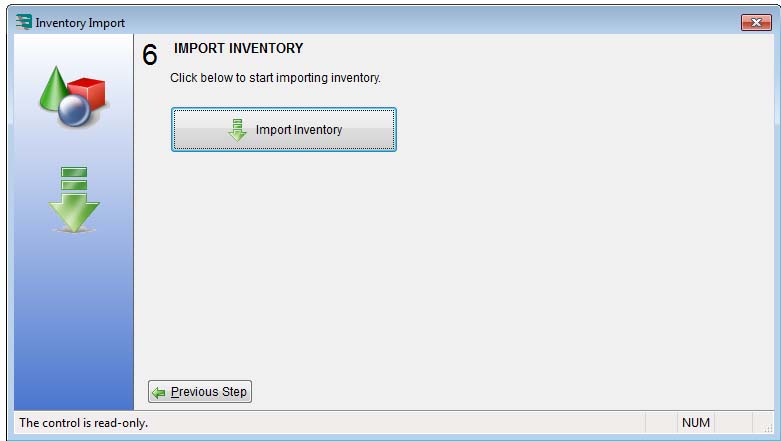
9. In the Inventory Import Step 6 window, click the Import Inventory button.
NOTE: Spreadsheets saved with an .xls or .xlsx file extension will occasionally produce formatting errors. If this occurs, safe the file as a .csv (comma separated values) file and reimport.

